A zippered pouch is a versatile and practical sewing project, perfect for beginners․ It offers a great way to organize small items while showcasing creativity․
Why Make a Zippered Pouch?
Creating a zippered pouch is a rewarding DIY project that offers both practicality and creativity․ It’s an excellent way to organize small items like makeup, jewelry, or electronics․
Zippered pouches make thoughtful gifts and can be customized to suit any style or occasion․ They’re also eco-friendly, as they can be made from scrap fabric, reducing waste․
For sewists, especially beginners, this project is a great way to practice working with zippers and hones sewing skills․ The sense of accomplishment and utility makes it a popular choice for crafters․
Uses for a Zippered Pouch
A zippered pouch is incredibly versatile, suitable for storing various small items․ It can be used as a makeup bag, jewelry organizer, or tech accessory case for cables and chargers․
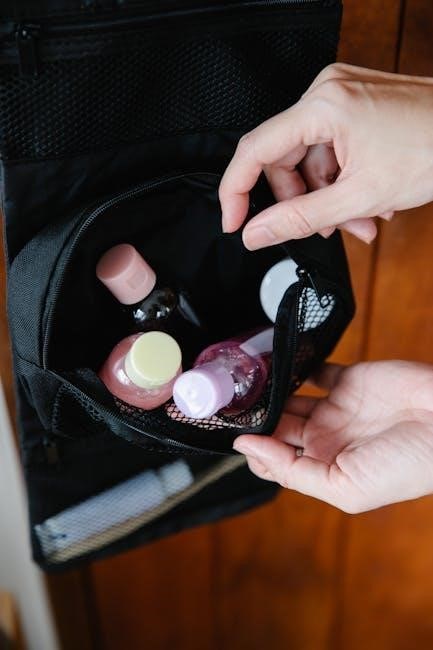
These pouches are also ideal for travel, keeping toiletries or medications neatly packed․ Additionally, they serve as stylish pencil cases or coin purses, adding functionality to everyday carry․
With customizable sizes and designs, zippered pouches can adapt to meet specific needs, making them a practical and stylish solution for organization and convenience in daily life․

Materials and Tools Needed
Gather fabric, zippers, thread, scissors, pins, and a sewing machine․ These are the basics to craft a durable zippered pouch․
Fabric Requirements
Choose durable fabrics like quilting cotton, canvas, or twill for your zippered pouch․ These materials offer structure and longevity․ Cotton is ideal for beginners, while canvas adds a sturdy feel․ For a luxurious touch, consider leather, which works well lined or unlined․ Ensure fabrics are pre-washed to prevent shrinkage and pressed before cutting․ Using contrasting fabrics for the lining and exterior can add a stylish, personalized touch to your pouch․ Proper fabric selection ensures a professional finish and enhances functionality․
Zipper Selection
Selecting the right zipper is crucial for a functional zippered pouch․ Choose a zipper that matches your pouch size and desired aesthetic․ Metal or plastic zippers are options, with metal offering a more durable choice․ Opt for a zipper slightly longer than your pouch width for easy installation․ Ensure the zipper’s color complements your fabric to create a cohesive look․ Proper zipper length and type are essential for smooth operation and a polished finish․
Essential Sewing Tools
To create a zippered pouch, gather essential sewing tools․ A sewing machine is vital for stitching fabrics together․ Sharp scissors or rotary cutters are needed for precise fabric cutting․ Pins will help align materials accurately․ A seam ripper is handy for correcting mistakes․ Measuring tapes and rulers ensure accurate cuts․ An iron and ironing board are crucial for pressing seams․ Optional tools include a zipper foot for your sewing machine and a walking foot for smoother stitching․ These tools will streamline the process, ensuring professional-looking results․
Fabric Preparation
Fabric preparation involves pre-washing, drying, and ironing to remove shrinkage and ensure stability․ Accurate cutting is essential for a polished, professional finish․
Choosing the Right Fabric Type
Selecting the right fabric is crucial for a zippered pouch․ Quilting cotton is ideal for beginners, offering a soft, lightweight finish and vibrant patterns․ Canvas or twill provides durability for a sturdier pouch, while leather adds a sophisticated, premium look․ Consider the intended use and desired aesthetic when choosing fabric․ Lightweight fabrics are great for small items, while heavier materials offer structure․ Always ensure fabric is suitable for sewing and aligns with the pouch’s functionality․ Proper fabric selection enhances both usability and visual appeal․

Pre-Washing and Cutting Fabric
Pre-washing fabric ensures it shrinks and settles before sewing, preventing misshapen pouches․ Cut fabric according to pattern or tutorial instructions․ Use a rotary cutter and mat for precise cuts․ Ensure pieces are labeled to avoid confusion․ If using interfacing for structure, cut it simultaneously․ Accurate cutting is key for a professional finish․ Iron fabrics before cutting to remove wrinkles․ This step ensures smooth sewing and precise alignment, making the sewing process easier and more efficient․ Proper preparation guarantees a well-made pouch․

Step-by-Step Sewing Guide
A comprehensive, easy-to-follow guide for all skill levels․ Learn to align fabrics, sew zippers, and construct a pouch with clear, step-by-step instructions for a polished finish․
Aligning Fabrics and Zipper
Aligning fabrics and the zipper is crucial for a professional finish․ Place the outer fabric right side up, then the zipper, and finally the lining fabric right side down․ Ensure all edges are matched and smooth out any wrinkles․ Pin securely to maintain alignment, especially at the corners․ This step ensures the zipper is centered and functional, making the sewing process seamless; Proper alignment prevents misplacement and ensures the pouch closes smoothly once completed․
Sewing the Zipper in Place
Start by placing the outer fabric right side up, followed by the zipper, and then the lining fabric right side down․ Align the edges carefully and pin in place․ Sew along the zipper edge using a 1/4-inch seam allowance․ Backstitch at the start and end for security․ Ensure the zipper teeth are centered and the fabric is smooth․ Use a zipper foot for precision․ After sewing, leave a small opening to turn the pouch right side out․ This step secures the zipper, creating a functional and professional-looking closure for your pouch․
Constructing the Pouch
Place the main fabric and lining right sides together, ensuring the zipper is centered․ Pin the edges and sew around the sides and bottom using a 1/4-inch seam allowance․ Backstitch at the corners for durability․ Leave a small opening to turn the pouch right side out․ Carefully press the seams with an iron to create a crisp fold․ Once turned out, topstitch around the edges for a polished look․ This step brings the pouch to life, forming its structure and preparing it for the final touches like boxed corners or additional embellishments․

Finishing Touches
Finishing touches enhance both the appearance and durability of your zippered pouch․ Pressing seams, adding boxed corners, and topstitching are essential steps that give your pouch a polished look․
Pressing Seams
Pressing seams is a crucial step in creating a professional-looking zippered pouch․ Use a hot iron to press seams flat, ensuring they lie smoothly and evenly․ This step helps the fabric relax and prevents bulkiness, especially around the zipper area․ Pressing also helps define the pouch’s shape and makes topstitching easier․ Pay special attention to the zipper seams, as a crisp press here ensures the zipper functions smoothly and the pouch maintains its structure․ Proper pressing enhances both durability and aesthetics, giving your pouch a polished finish․
Adding Boxed Corners
Adding boxed corners enhances the structure and aesthetics of your zippered pouch․ To create them, sew straight lines at the bottom corners, then trim the excess fabric․ This step gives the pouch a defined shape and prevents bulky seams․ Use a ruler or sewing gauge for precise measurements․ After sewing, carefully trim the seam allowance to avoid fraying․ Turn the pouch right side out and press the corners to ensure they lie flat․ Boxed corners add a professional finish and make the pouch more functional for storing small items neatly․

Tips and Variations
Enhance your zippered pouch with creative touches․ Use vibrant fabrics for a pop of color․ Add handles for convenience․ Customize with embroidery or unique zippers․ Personalize sizes and shapes for different uses․ Incorporate leather accents for a modern look․ These tips make your pouch functional and stylish․
Customizing Your Pouch
Customize your zippered pouch to match your style․ Choose vibrant fabrics, add decorative stitching, or incorporate embroidery for a personal touch․ Use contrasting thread for a bold look․ Add handles or straps for easier carrying․ Experiment with different zipper colors or sizes to enhance functionality․ Consider adding pockets or compartments for better organization․ You can also personalize the pouch with appliques, patches, or monograms․ These creative tweaks make your pouch unique and functional, ensuring it stands out as a one-of-a-kind accessory․
Advanced Techniques
Elevate your zippered pouch by incorporating advanced techniques․ Add boxed corners for a professional finish or create a lined interior for a polished look․ Experiment with contrasting fabrics or leather accents for a sleek, modern aesthetic․ Try topstitching for a decorative edge or add magnetic snaps for extra functionality․ For a unique touch, incorporate appliques or embroidery․ You can also add internal pockets or use zippers in bold colors․ These techniques allow you to customize the pouch to your style while maintaining durability and functionality, making it a standout accessory․